Dismantling a shed: A step by step guide
There are several reasons why you might be dismantling a shed. You might be:
- Selling an old shed that still has some life left in it, to make way for a new one
- Buying a used shed on eBay and you need to go and dismantle and collect it
- Moving house and taking your shed with you. An increasingly popular option with more expensive garden offices.
Whatever the reason it is worth a short period to get your thoughts together to plan in advance:
- Tools required and tips for taking apart
- Potential hazards
- Sequence and methods for dismantling
- Method of transportation of the dismantled shed
Tools required for dismantling a shed
The tools required for dismantling will vary depending upon how the shed is fixed together. And also the conditions of those fixings.
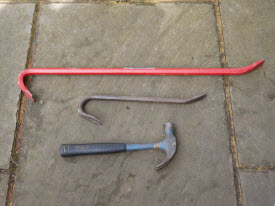 Hammer with small and large wrecking bars
A claw hammer is good for extracting small nails. You will benefit from the extra leverage of a wrecking bar for removing larger nails (longer than 2").
The wrecking bar is also be usefull for prying apart sections of timber that are reluctant to be separated.
The longer bar in the picture is 750mm (30") long and so has a big leverage advantage for prising things apart over the smaller bar and the hammer.
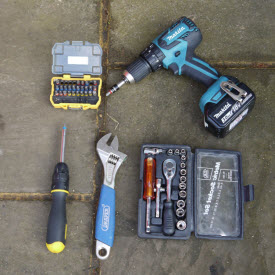 Screwdriver, cordless drill/driver, selection
of bits, adjustable spanner and ratchet socket set.
Screws can be removed with a manual screw driver or if there are many screws a cordless drill/driver will save a lot of muscle ache.
Check out the shape of the heads of the fixings that are used. Are they pozi-drive or hex heads? Are they OK to remove with a drill/driver or will you need a socket set?
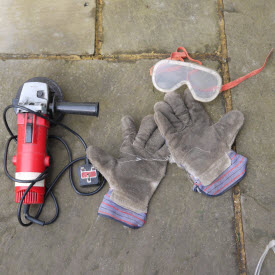 Angle grinder with protective gloves
and eye protection.
Hopefully the shed you are going to work on has panels that are screwed or bolted together (Screws and bolts are generally easier to remove without damaging the timber than nails). If the nuts are in good condition you will be able to release these with a spanner/socket set. If they are rusted up, an angle grinder will make short work of cutting the nut off the bolt.
With all of the tools make sure that you have on hand Personal Protective Equipment (PPE). This includes gloves for protecting the hands against splinter, nails, screw and sparks from the angle grinder. Using protective goggles is also recommended when dismantling a shed and using the angle grinder.
When you have got the tools together and before you start dismantling a shed you will need to do a quick survey to check on the materials that you will be working with.
Potentially hazardous materials
Depending on the age of the shed the type of materials used for construction will vary.
Glass will be present in most sheds. If you are taking the windows out then the glazing may stay within the frame. For sheds that have fixed panes then carefully removing the glazing bead will allow you to remove the pane of glass intact. Moving a panel of a shed with the glass in place always carries the risk that the glass will be broken at the most inconvenient moment.
Hopefully you can remove the glass and re-install it at the other end when the shed is re-erected.
Some roofing materials such as metal sheeting or clay tiles can be put to one side for re-use. Other materials such as bitumen felt or bitumen tiles will be unlikely to be in a condition for re-use. Bitumen containing products should be disposed of through your local recycling centre. Probably as hazardous waste.
The timber that the shed is built from is not hazardous as such. If you have timber that you need to dispose of. Then bear in mind that untreated/unpainted timber is fine to burn. But timber that has been pressure treated or painted is likely to have metal residues that aren't great to enter the ecosystem. Taking the timber to the local recycling centre will be the best way to dispose of this material.
With much older sheds it is still possible that you will come across materials containing asbestos fibres. If you do you will need to take specialist advice with regards to local disposal regulations. The danger from asbestos comes from inhalation of the fibres so generally if left in its original location it will not be harmful.
If you suspect a piece of material is asbestos take photographs. If there is a small fragment put a sample in a plastic bag, seal the bag with adhesive tape and take it to a specialist asbestos removal company who will charge a small fee for testing. Dependent on the result they will then be able to advise you further once they have the test results on the best course of action for removal.
 Check weather forecast for predicted wind, rain,
temperature (hot or cold) and cloud cover
And also look at the weather forecast! Rain or strong winds are not ideal for dismantling a shed. Rain makes the timber slippery and difficult to handle. Strong winds make the partially dismantled structure potentially unstable. Individual wall and roof panels can be difficult to handle in strong gusts of wind.
Check your detailed local weather forecast on these two sites.
www.metoffice.gov.uk - For UK weather forecast
weather.com/forecast/national - North American weather
Before you start to dismantle take a moment to consider how the shed was assembled.
Dismantling a shed is essentially the reverse of the construction process.
The first step is to remove the door(s), windows, fixtures and fittings. The main reason for removing them is to protect them from damage and also to make the wall panels (which will be heavy) lighter.
The next step is to remove the roof covering and roof deck. Some roofing materials such as epdm can be re-used when the shed is re-assembled others such as roofing felt are likely to crack and have a limited future life.
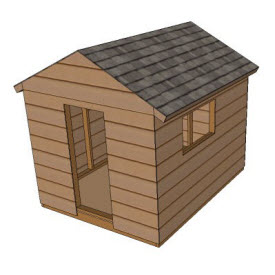 Shed with doors, windows and gutters removed
With the shed roof covering removed you can understand if the roof can be lifted off as panels or whether it needs to removed piecemeal. The size of panels will also dictate if you need additional help and how many people you need. Remove bolts/nails using the tools previously described.
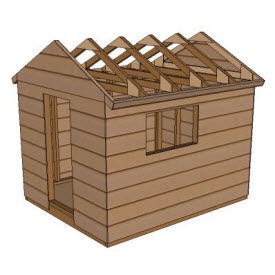 Roof covering and roof deck removed to expose
roof structure
The roof structure may be purlins or timber trusses. These can be removed once the roof decking has come off. There will also be other smaller pieces of roof trim, that if you can remove without damaging them will save time and money when the shed is re-erected in its new location.
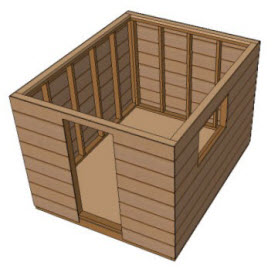 Shed roof structure removed and ready to
remove first wall.
You should now have just the four walls left. The shed should be relatively the stable with just the four walls in place as they will stabilise each other.
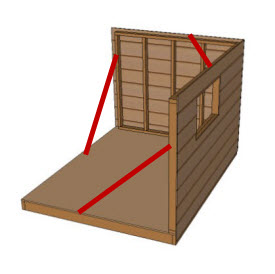 Two shed walls remaining, with potential brace
locations shown in red.
When dismantling a shed the structure becomes less stable as you progress. You may need to fix some temporary braces to stabilise the remaining walls as you continue removing panels. These braces can take the form of timber braces screwed to the wall and floor of the shed, or plan braces fixed across the corner. These braces act to triangulate the corners of the shed and stabilise one wall off another.
The first wall can now be removed. I hope that the shed that you have has been bolted together. Bolts are a lot easier to remove without damage the timber structure than if 4" or 6" nails have been used.
As each panel as it is removed can be stacked either one on top of another horizontally or leant vertically against a solid object such as a mature tree. Once again make sure that the panels will be stable when all of the panels are in place.
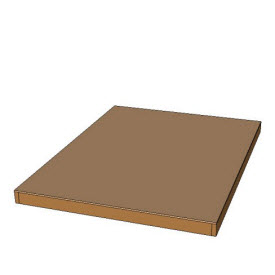 Remaining shed floor ready to be dismantled
The remaining element is the floor. This is can be on of the heaviest elements of a shed. The floor boards/panels are often 18mm thick (twice as thick as the walls). You may want to remove the floor boards and then dismantle the floor structure, which once again can be made of timbers that are heavier than those used elsewhere in the building.
The final stage is to move the panels either for disposal or to the new location
If the panels are being taken for disposal then they can of course be sawn up into smaller sections for loading into a car, van or pickup.
If the panels are to be transported then they will likely be wider than a standard vehicle and so strapping them to the vehicle roof won't be an option.
Moving the shed panels on a trailer is the most likely option. In this case they should be transported vertically in a trailer with vertical posts that the panels can be secured to. Once again keep an eye out for the weather. Transporting a relatively light structure at speed on a windy day is not recommended.
Summary
Dismantling a shed for relocation and re-assembly is a relatively straightforward operation. Make sure that you have the right tools and a good idea of the intended work sequence before you start.
Also keep an eye on the weather using a web site such as the Met Office to choose a good weather window to do your work.
Transporting the shed is relatively straightforward too but consider the maximum panel size and any local regulations regarding vehicle loadings, widths and heights.
Related posts:

Keep in touch with our monthly newsletter
Shed Building Monthly


