How To Grow Your Own Green Roof Plants
You might be unwilling to spend a lot on expensive green roof plants for your shed roof if this is your first foray into this field. This article shows you how to source plants for your new roof in a low-cost way.
Growing and collecting your green roof plants should start well before you begin building your shed
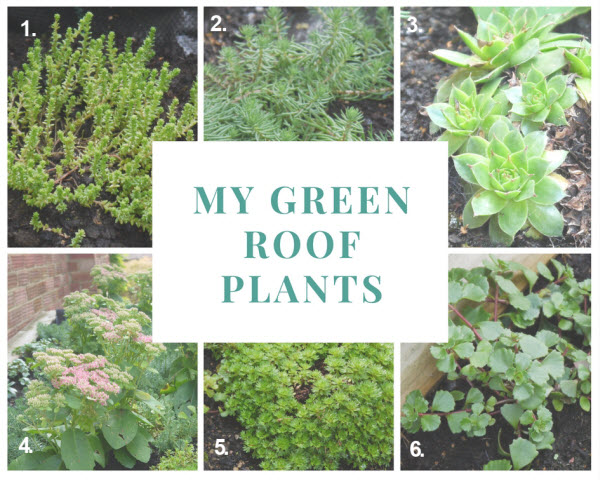
I spent a while noticing plants growing in dry environments around the neigborhood. The picture below shows each of plants that I used on my new roof. The text below the image also describes where I found the plants.

- I spotted these sedum growing on the moss and debris on a corrugated garage roof.
- These succulent plants were growing in a dry section of the road verge.
- I spotted these semper vivum in a stone wall.
- I already had some succulent plants growing in my garden.
- I bought these saxifrage plants from a local garden centre.
- I noticed these broad leafed succulent plants in a rockery fronting the road whilst out walking the dog.
I thought that having 6 varieties of green roof plant would be a good start for this 1.2 x 2m patch of roof.
I worked on cultivating samples of each of these plants
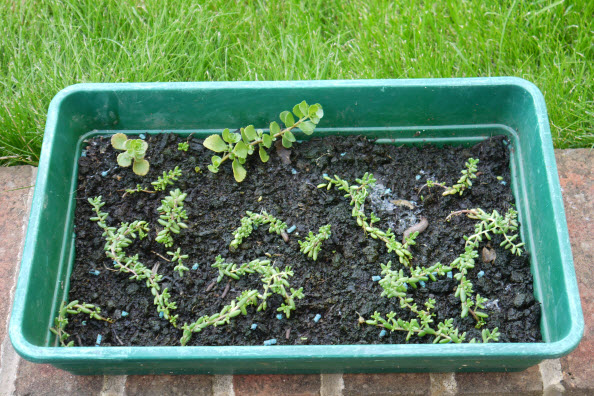
I used a seed tray with a thin layer of peat (approx 25mm) to create a similar growing medium to that on the roof. I then selected small samples of each plant, dipped the ends in water and then in a powdered rooting hormone. The rooting hormone was intended to stimulate root growth in the cutting. Plants such as sedum do not necessarily need the rooting hormone, but I figured it couldn't hurt.

The plant trays with the cuttings were left outdoors in a sheltered spot. This enabled the plants to grow and the roots to become established. As the seedlings grew and developed they became independent plants. In my experience the plants could be transplanted on to the roof after 4-6 weeks. This might vary where you are, dependent on the type of plants you use and the time of year.
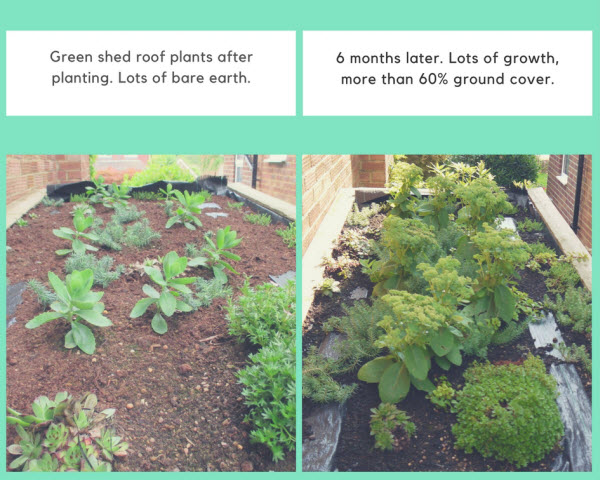
When the plants are established, they can be transferred on to the shed roof. Plant the young seedlings with plenty of space between them so they have space to grow. In a few short months the seedlings will become a 'mat' of vegetation on the roof.
I saw my plants grow fairly quickly. Occasionally a shoot got too long, bent over, touched the soil and started to grow roots. This vegetative method of expansion meant further plants did not need to be added.

At the time of writing (October) my small green roof had been established for about 6 months.
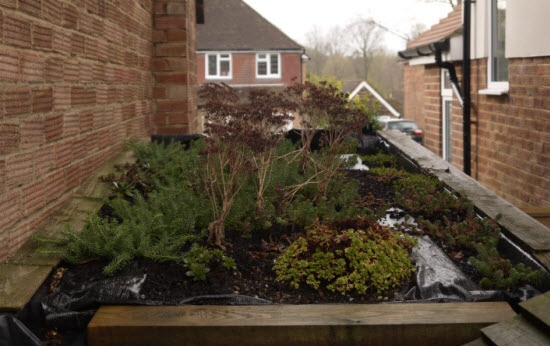
Winter update - January:
 The green roof is dormant at this time of year. The low growing plants have retained their foliage. The larger growing sedum plants have died back
in the cold weather. They will grow back in the Spring. I may also reduce the number of these larger plants as they do seem to dominate the roof.
What have I learnt from the green roof experiment so far?
The roof has remained watertight with no leaks as yet. ;-)
The main lessons have been learnt from the types of green roof plant that I chose.
The most successful were the low and slow growing sedum plants.
The less successful were:
The variety of sedum that I had previously growing in my garden was too vigorous. It grew fast and tall, it has started to shade out the other plants on the roof. Also in winter I can see it getting blown by the wind. Once it has flowered in the autumn I will be replacing it with another lower growing type of sedum.
The plant that I bought from the garden centre was a variety of Saxifrage this was not quite suited to the harsh environment on the roof. In the heat of the summer the plant got burned on the side most exposed to the sun. Although the plant survived and expanded slightly it hasn't thrived. I will be keeping an eye on this plant; I hope it succeeds as I like its flowers.
The final plant that could have done better was the semper vivum. The original habitat of this plant was growing in a dry stone wall, where it had access to virtually no water. Although the Semper vivum did not thrive, it didn't die completely. The plants that did best were the ones in the thinner soil and drier areas. Which, my research tell me is what Semper vivum plants like best.
To summarise
My green roof plant growing experience is summarised below;
- The low growing sedum plants are the best for creating a low-maintenance green roof.
- My experiment with larger plants showed that they quickly grew big and may have to be removed.
- The rockery type plant needed a deeper soil to allow additional root growth and water.
- The semper vivum needed a drier environment to reproduce and thrive.
I will update with future experiences in the next season. I suspect that wind-blown seeds may have accumulated in the soil over the summer. In the spring there is the possibility they will grow and out-compete the sedum. But I expect that the harsh environment on the roof will mean that these interlopers won’t last long.
Related posts:
- How to build a low-cost green shed roof
- EPDM is the ideal material to keep a green shed roof waterproof

Keep in touch with our monthly newsletter
Shed Building Monthly


