How to hang a shed door
Hanging a shed door is very straightforward. I can show you how to hang a simple ledged and braced shed door using this shed I recently built as an example.
I had built the ledged and braced door from scratch to fit the door opening size. If you are replacing a shed door or fitting a pre-made door to a shed you have built yourself you should undertake a couple of checks.
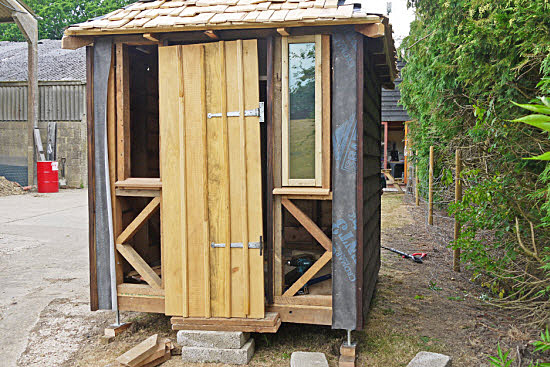 Shed door in location of rough opening
Checks to undertake before you start to hang a shed door
Measure across the diagonals of the door and also the opening to confirm that they are square. You could also measure the principal dimensions (door width and height) to make sure that the door fits the opening. Though this will rapidly become apparent when you trial lift the door into position.
There should be some tolerance around the perimeter of the door to account for movement of the door due to changes in moisture content over the course of the year (in both the timber frame and the door). I would suggest about 5mm all around the perimeter of the door.
If for some reason the door doesn't fit you will need to make adjustments.
If the frame or the door isn't square then you will need to work out where the out of squareness if any of the door needs to be cut off.
A small amount of timber (up to about 5mm say) can be taken off by using a plane (a hand or electrical plane), anymore than this and you will need to use a saw. Mark carefully where you intend to cut with a pencil and use a circular handsaw using a batten clamped to the surface of the door as a guide.
You have fitted a door stop around the door frame, haven't you?
Before you lift the door into position check that there is a door stop fixed around the perimeter of the door frame. You can see this on the picture. The door stop gives a solid edge for the door to close against and also helps to reduce draughts.
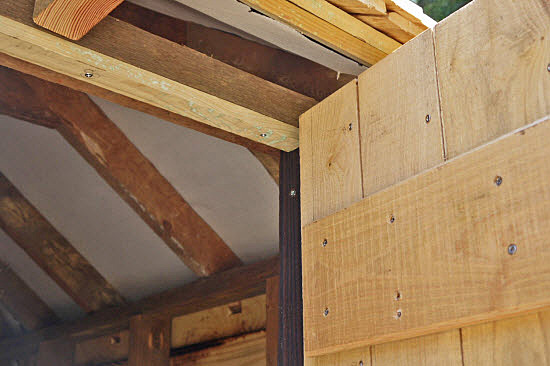 The door stop (visible across the top of the door frame) forms a solid edge for the door to close against
Lift the shed door to trial install it in position
Once you have confirmed the door will actually fit the hole lift it into position. You can see from the picture at the top of the page that I had screwed the hinges to the door before lifting the door into position.
The door hinges were to be fixed to the 4x2 door lining that was fixed to the shed frame. This lining also forms an edge for the siding to butt up against on its other side.
Shed doors are relatively heavy so after roughly positioning the door in the frame use wedges (cut on a slope of 1:6) to adjust the door for height and level.
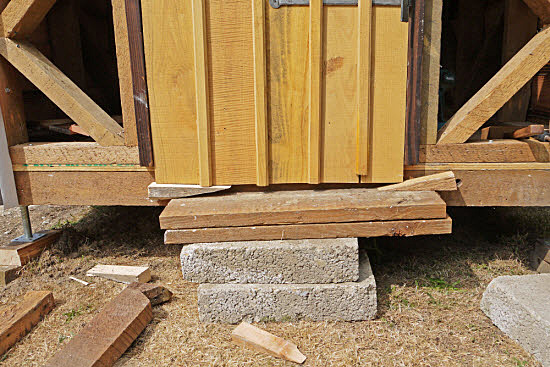 Using wedges to line and level the door
Use a hammer to tap the wedges in to make adjustments to the doors position. Tap both wedges equally an equal amount to raise/lower the door. Tap a wedge on one side only to raise or lower that side. The aim here is to get a nice even gap around the perimeter of the door.
Installing hinges on the shed door frame
With the door in position screw the hinges to the door frame. Make sure that the hinge is straight at this point, with the door closed.
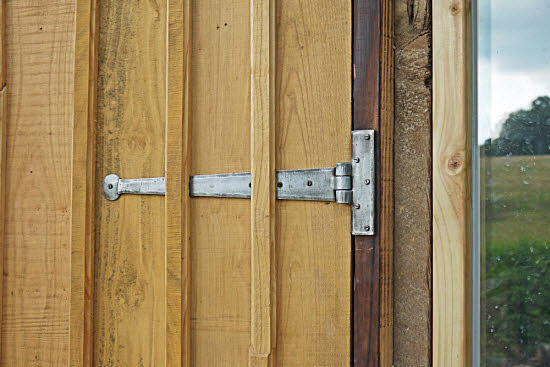 Hinges are fixed to the door before it is lifted into place
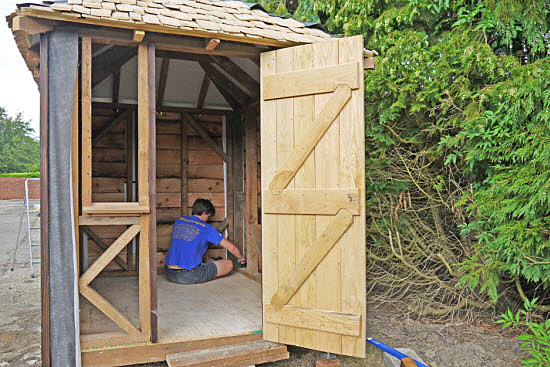 Checking the 'swing' of the door
Give the door a trial swing to make sure that it didn't move while you were fixing it. Hopefully you will find that all is well and that there are no adjustments to be made.
Don't stop now though you are only part way through the job.
You will also need to install a lock/latch to keep the door closed
Fitting the hinges is only part of hanging a shed door. You will also need to install a latch and/or lock and possibly a handle as well.
For this project I had made a wooden 'shoot bolt' out of the same 'sweet chestnut' timber that I had used for the door. I screwed the staples retaining the bolt to the central batten of the door. I needed to cut a recess in the door lining to accommodate the bolt. The recess was cut with a mallet and chisel as was the hole through the door to accommodate the dowel and door handle.
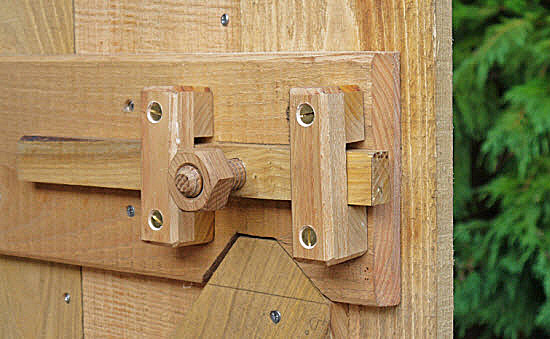 View of the shoot bolt fixed to the central door batten
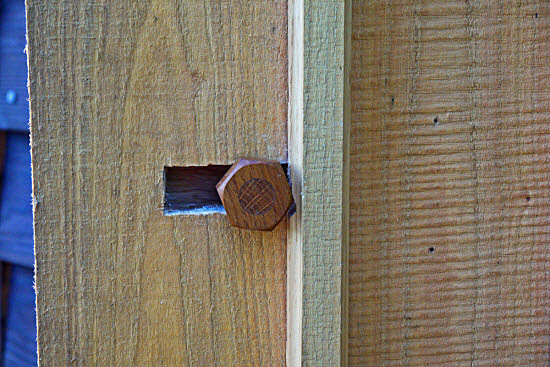 View of wooden latch from the outside
If you are going to install a lock on a shed door like this then a rim lock, surface mounted to the back face of the door is the way to go. A modern version of the rim lock is the 'long throw bolt' type lock. This lock enables a door such as this to be locked securely with a 20mm square steel bolt into a keep made of 3mm folded steel securely coach screwed to the door lining. On the outside of the door all that can be seen is a discreet brass plate, so this fits in well with most shed door designs.
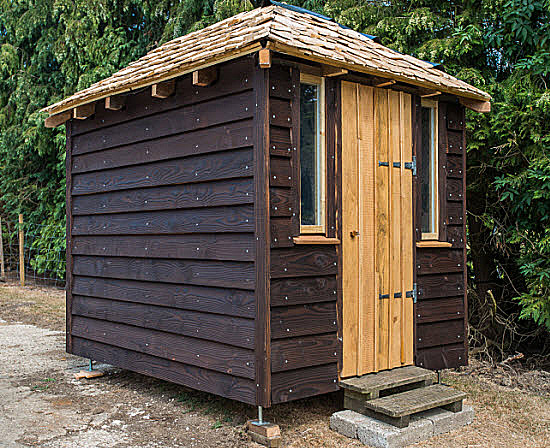 Shed door installed, latch fitted and cladding completed
Summary of how to install shed doors in 7 steps
The shed door hanging process starts with checking that the dimensions of the opening and the door are compatible, allowing for a little tolerance around the perimeter.
Fix the T hinges/strap hinges to the door face.
Make sure that a door stop is installed around the perimeter of the door opening.
Lift the door into position and use wedges to lift and straighten the door into its final position.
Screw the shed door hinges to the door frame.
Check how the door swings if it binds you can use a plane to take of any minor spots.
You will also need to fit a latch and/or lock to the door to keep it closed.
Next step

Keep in touch with our monthly newsletter
Shed Building Monthly


