Log Cabin Repairs: A Guide to Major Repairs for Scandinavian Garden Buildings
As the owner of a charming machined log garden building, you've probably enjoyed countless hours in your Scandinavian retreat, nestled in the tranquillity of your own back garden. But after about 10 years or so, you might start to notice the effects of time and use.
So what are the main problems that occur with log cabins over time?
Firstly, weather damage
This occurs due to the continual cycle of rain, wind, snow and then beating sun. The logs that make up your garden building are continually exposed to the external environment, causing them to weather over time. This causes significant wear and tear, and even structural damage, if not addressed promptly.
Next is a leaking roofThe cabin roof bears the brunt of the weather, such as sun, rain and snow. Leaks are likely to develop over time. If you don't fix the roof, water damage will be the result on both the interior and exterior of the cabin. This then follows on to problems like mould, timber decay, and a damaged foundation.
Problems with the foundations take time to developSettlement and structural movement can also become a problem. Like any structure, log cabins will naturally settle over time, often due to problems with the foundation. This ground settlement can result in doors and windows that no longer close properly, sloping floors and significant structural issues.
Small problems often develop into larger onesFinally, lapsed maintenance is another problem that can affect the condition of your cabin. A log garden building requires some care to remain resilient and keep its appealing aesthetic. Failing to regularly maintain your cabin by the regular re-application of protective stain and repairing minor issues can result in greater damage further down the line.
Can the above problems be repaired, to give your log cabin a new lease of life?
Now that we have identified the common problems, how can you go about repairing and prolonging the life of your log cabin? I have put together a guide below to help you navigate through the some typical repairs and upgrades. Each project is different as a result of individual circumstances but there is generally a practical repair solution that will work out much more economic than replacing the whole building.
Let's start with renewing the roof coveringOver the course of a decade, the roof of your log cabin will bear the brunt of harsh weather elements, potentially leading to leaks. To tackle this, a damaged roof covering should be entirely replaced.
Choosing a weather-resistant material will ensure the longevity of the roof covering. Probably the most common cabin roof covering is felt shingles. These come in a variety of shapes and colours to give a variety of appearances. These have a life expectancy of 10-15 years. Another popular material is EPDM, what this material lacks in external beauty is more than made up for in its longevity. The manufacturers claim that roofs are still in use that were first installed 50 years ago.
The first picture shows a large log cabin approaching the end of a project to replace the felt shingles
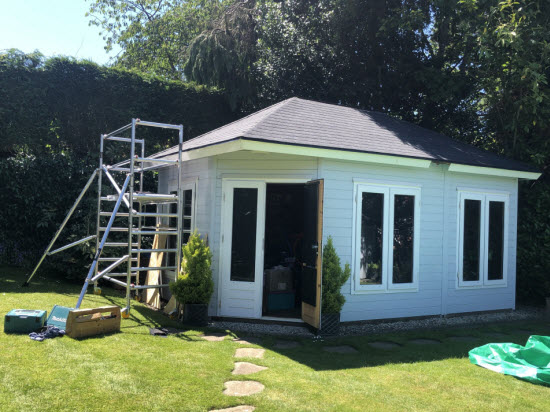 Works almost complete to replace the felt roof tiles on this large log cabin in Sevenoaks, Kent
The second picture is my own shed, which has a hipped roof. After it had felt shingles for the first 15 years of its life I decided to use EPDM for the next phase.
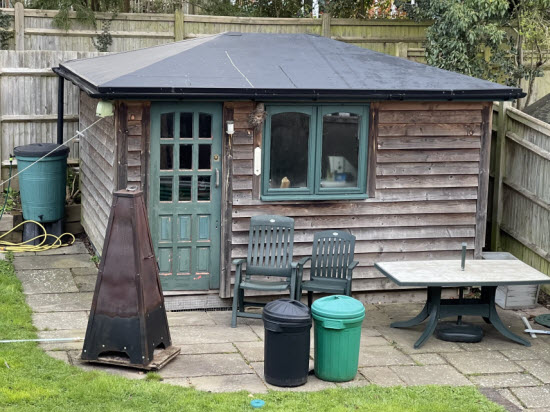 EPDM can be used on hipped roofs as well and gable and monopitched roofs
Next up, let's look at decaying logs at the base of a log cabin
This type of log cabin timber decay is usually a consequence of exposure to weather and the surrounding damp ground. Not to worry though, decayed bearers and logs at the bottom of the cabin can be replaced.
Typically, this involves lifting the cabin onto temporary supports, removing and substituting the decayed logs, and then positioning the cabin back onto its base. Regular inspections and maintenance can help prevent further decay in the future.
The first example we have is a cabin where the bearers had started to decay
In this example the owner fortunately spotted the bearers decaying before it progressed into the logs forming the cabins structure. As you can see in the picture, when the old bearer was removed it almost completely disintegrated. The decaying bearer was then replaced with some new solid bearers made from recycled plastic. These wont decay and will also act as a damp proof course, protecting the logs above from decay caused by water on the ground and the damp concrete.
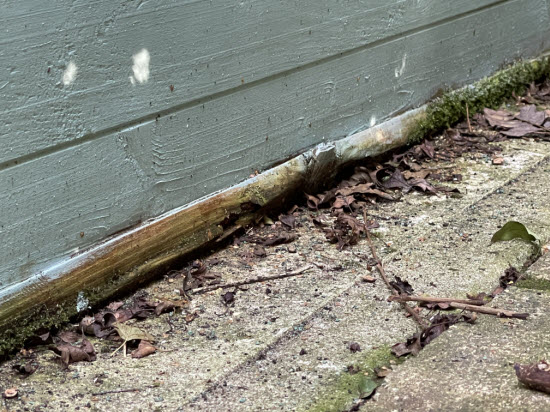 You can see on this picture that the bearer between the concrete base and the bottom log of the cabin is rotten
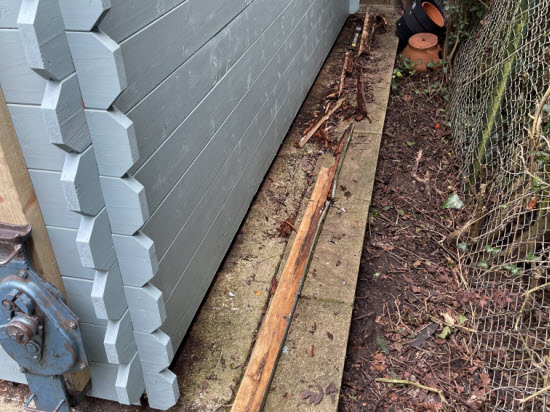 The bearer disintegrated almost completely when I started to remove it
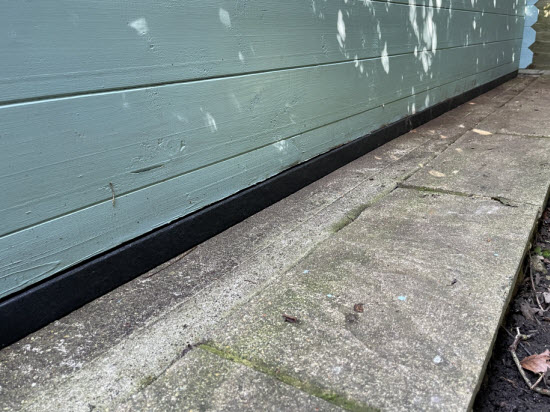 The new plastic bearer, in place. This acts as a combined bearer and damp proof course
The second example is a cabin where decay had progressed much further
Partly from damp in the ground and also due to lack of maintenance of the stain coating. All four corners of the building were compromised and access was difficult due to the proximity of the boundary fence. In this case we decided to use more traditional shed panels (robustly constructed) to replace the lower logs. I jacked up the building, cut out the lower 5 courses of logs and inserted the panels beneath. This, along with upgraded foundations and a new floor should give the cabin a new lease of life.
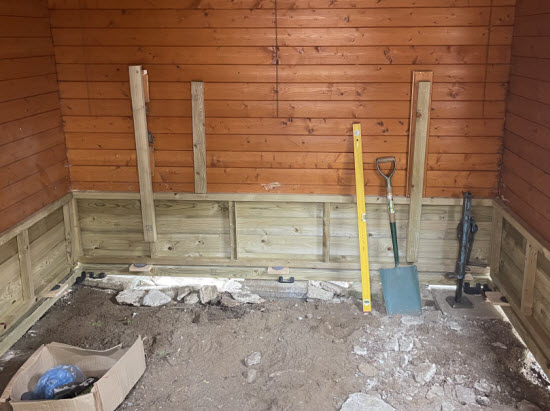 The building was temporarily lifted and the bottom sections of the walls replaced sequentially
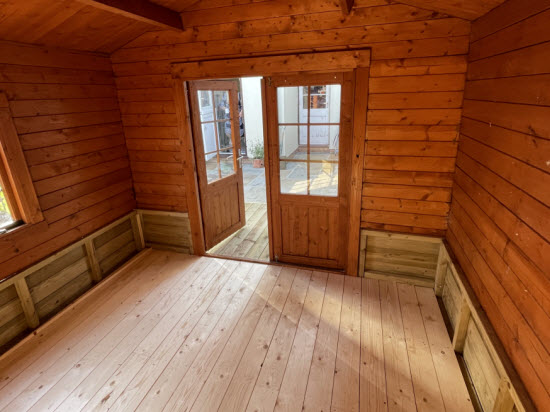 A new floor was installed
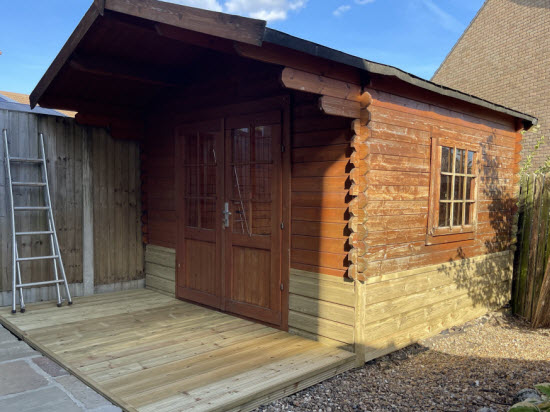 View of the outside of the log cabin repair on completion
Consider re-levelling cabins that have subsided
You can also take the opportunity to upgrade the foundations. Over time, the ground underneath the cabin can shift, causing subsidence. If your cabin is beginning to tip or settle significantly, it may need to be re-levelled.
A professional log cabin repair service will use jacks and other tools to realign your cabin, potentially adding improved foundation supports as required. Upgrading the foundation to a concrete or gravel pad can also provide added stability, ensuring that your cabin remains level and solid for years to come.
The foundations on this cabin had never been sufficient
This was a large, 7.5 x 7.5m cabin in Uckfield, East Sussex. It had double skin walls each 50mm thick. The situation when I first visited was that there was a visual slope to the floor and the cabin was effectively unusable.
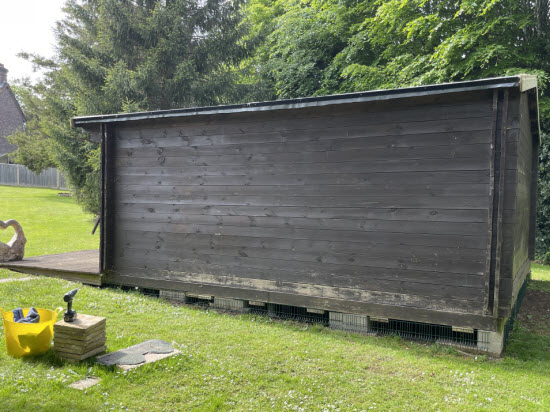 Before levelling work started the bottom log on this cabin was supported on the ground
I removed the floor boards to expose the ground beneath. I then lifted up the outside shell of the building so that it was level. Rather than the post system that had been used previously, I used a series of concrete blocks to spread the load more evenly. As you can see from the outside, these blocks are substantial. Previously, before I lifted the building, the logs on this side of the building had almost been in contact with the ground!
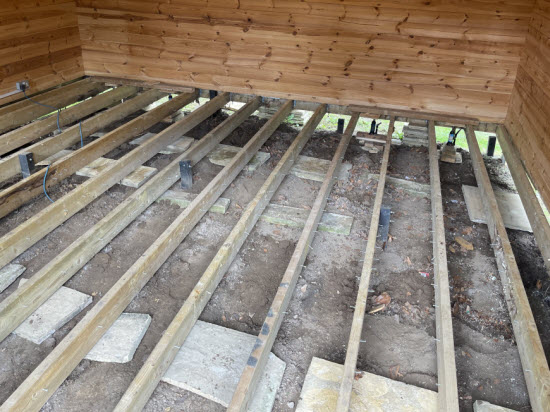 View of inside the log cabin during repair work. Jacks were used to raise the building and new concrete pads used as permanent supports
Lastly, replacing decayed log cabin corners
The connection between interlocking logs is a vulnerable area on many log cabins and is often overlooked. Water from rain and snow gets into the joints if the protective coating isn't maintained and the resulting dampness leads to decay of the wooden joints.
These damaged corners can undermine the structural integrity of the whole cabin, so it's crucial to replace them promptly. Expert craftsmanship is required for this delicate procedure to ensure the structural stability, aesthetic appearance and weatherproofing qualities of your log cabin.
If only one or two corners of the building are damaged then it is possible to just replace the corner logs over a short length. Rather than replace the whole bottom section of the cabin as I did in the example further up the page.
For the repair in the example below, I machined some new timber to the same thickness and profile as the existing logs.
I then reconstructed the corners and installed them in the building by cutting out the old-decayed corners and inserting the new ones. The connection between old and new is an important detail to get right to allow the logs to swell and shrink with the seasons. I have visited the owner of this cabin on a number of occasions since I completed the work, to work on other projects, and the cabin is performing well, years after its initial installation.
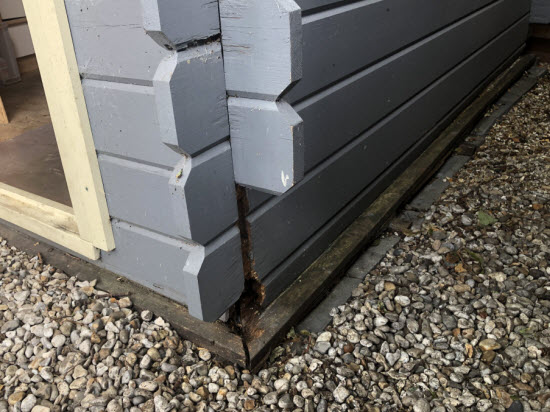 Prolonged exposure to water allows the interlocking cabin corners to decay
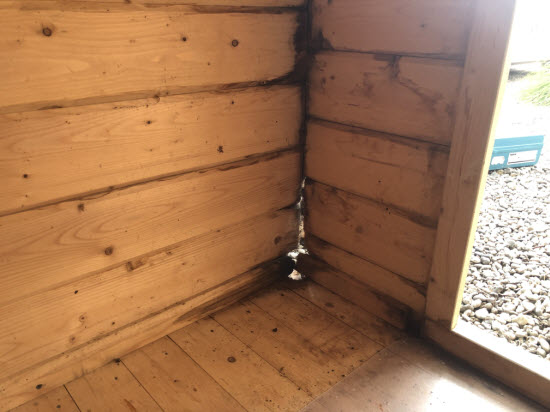 View of the decayed log cabin corner from inside
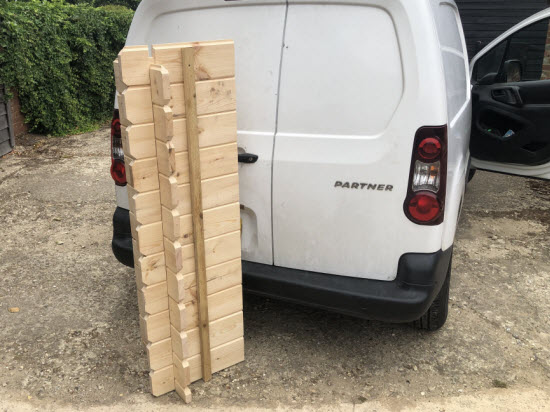 New corner sections are fabricated
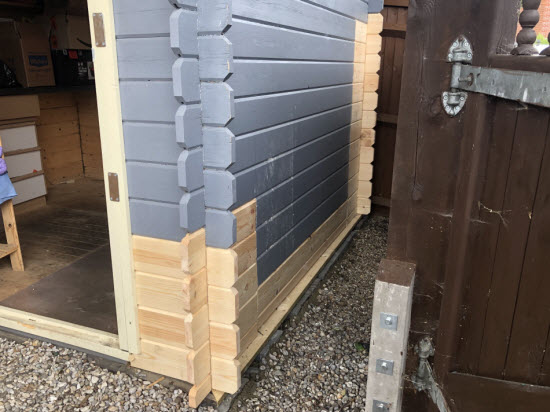 View of the repaired corners from outside
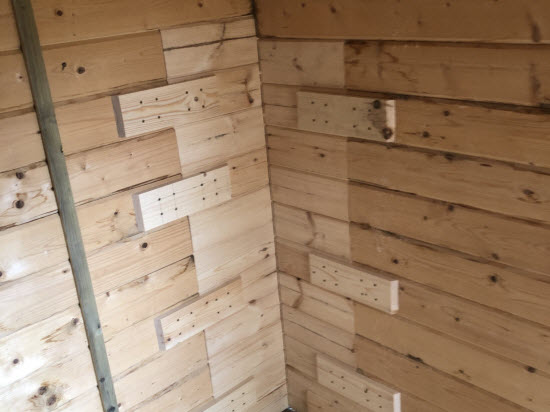 View of the repaired corners from inside
The importance of log cabin maintenance
By implementing the above repair solutions and then addressing the factors causing the deterioration of your log cabin, you can give your Scandinavian retreat a new lease of life.
However it is regular log cabin maintenance that is the key to preventing extensive damage and repair costs.
As we all know, prevention is better than cure. By taking pre-emptive actions, you can delay the onset of deterioration to your Scandinavian machined log garden building.
Two important components of preventative maintenance
The first is regular cleaning, staining, and sealing
This will keep your log cabin looking fresh and protect it from weather and pests. Also while taking on these regular tasks you are more likely to spot a small problem before it becomes serious.
Treating the wood with a quality timber treatment will significantly reduce the risk of decay and prolong the lifespan of your log cabin. Applying this kind of treatment every 3-5 years, depending on your local climate and exposure, will keep your log cabin in top shape.
The second important method to extend the lifespan of your cabin is to install roof guttering and have a strategy for dealing with roof water
The guttering system will collect the roof water and then take it to ground level away from the building. Reducing the amount of water from the roof draining down the walls and/or splashing on the ground really will help your building avoid premature ageing and timber decay.
Also paying attention to drainage around the base of the cabin will prevent water from pooling. This excess moisture leads to wood rot which can compromise the whole building's integrity.
How easy are log cabin repairs?
Even if you're someone who likes heavy do-it-yourself, these repairs may seem like a daunting task and they are! It is important to have the right tools and a good strategy. Things can go wrong and they do, it is important to have several options at each stage and not take undue risks.
If you don't feel confident undertaking these tasks or if the damage is severe, it's best to call in professionals. Professional log cabin repair services have expertise developed over time and a range of tools to undertake anything this type of work demands.
I run a shed and cabin repair service in Tunbridge Wells, Kent, the above pictures and projects all come from work I have personally undertaken. I understand the problems you're facing and have the experience implementing the solutions proposed.
A log cabin is not just a building
Your log cabin is more than just a garden building; it's a home away from home, an escape from the ordinary, a place filled with fond memories.
Having repair work undertaken to a log cabin can seem a major undertaking. However undertaking log cabin repairs whilst taking action to reduce the chances that it will occur again in the future is a good choice. Both for your pocket and also for the use of resources in our environment.

Keep in touch with our monthly newsletter
Shed Building Monthly


