Metal shed roofing - how to plan your install in 4 clear steps
Metal shed roofing has clear advantages over its common alternative asphalt shingles, it is commonly used on both metal sheds and will give a unique look to your common or garden wooden shed too.
Before we start on the details let's just look at a few of the great advantages of metal- In contrast to the asphalt shingle roof a sheet metal roof is long term durable - asphalt roof shingles have an expected life span of 15 years or less. Whereas metal roofing will stand the test of time with a life expectancy of 25 years ++.
- Low environmental impact - Metal roofing panels can be recycled at the end of their life whereas
- Wider range of roof slopes than asphalt shingles - Metal roofs can be used on the whole range of roof slopes from 'flat roofs' with a pitch of 6 degrees and for roofs with a much steeper pitch too up to vertical walls.
- Metal roofing is extremely resistant to high winds and the attentions of birds.
Anyway, that is enough of the benefits of steel roofs lets move on to the first stage of your metal roofing project.
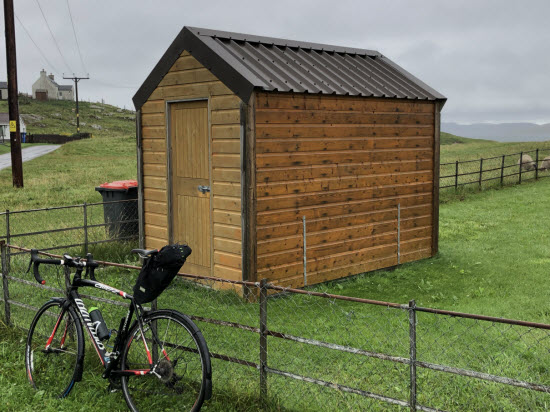 Fine example of a wooden shed with a metal roof. This one on the Isle of Eriskay in the Outer Hebrides, resisting high winds directly off the Atlantic.
Selecting the metal roofing profile
The most common metal shed roofing material is thin steel sheet that is galvanised, profiled and painted.
Other metals are used such as zinc, copper and lead, which I'm only mentioning in passing. These materials are several times more expensive than steel, require different installation techniques. And also are a target for thieves once installed!
Roofing sheets in the UK are available in two thicknesses, 0.5mm (24swg) and 0.7mm (22swg).
The heavier 22 swg material is the most widely used, with a typical purlin spacing of 1.0m.
The 24swg material is a lighter rolling used on smaller buildings. It is suited for domestic scale sheds and is slightly cheaper than 22swg sheets. However, the lighter material is more prone to damage and purlins are needed at closer centres (0.6m).
So you might want to weigh up whether the cost saving of the lighter material is really worth your while.
1.0 Panels are available in a variety of widths and lengths
Width
The sheet widths vary dependent on whether they are based on metric or imperial modules. A typical sheet width is about 1m or 3 feet.
One point to note is the difference between the width of the sheet and the actual 'cover width'. Each sheet must lap with the adjoining sheet to make a weather seal. Some systems recommend one corrugation whilst others need two, dependent on location. This requirement to lap the sheets affects the coverage and the number of sheets that you need to order.
Length
Sheets are normally available in lengths starting at 8ft (2.4m) and then increasing in 2ft increments to about 18ft. At which point they become quite unmanageable!
If you need sheets shorter than 8ft, say 5ft, and don't meet the minimum order for custom lengths. Consider buying the 10ft lengths and cutting them in half.
When you order roof sheets you will need to think carefully what length you require to minimise cutting and wastage.
If you want your metal shed roofing to last pay attention now!
The lifespan of your shed roof is governed by two factors:
- The local atmospheric environment
- The steel sheets corrosion protection system
Where you live has a huge effect on the lifespan of a metal roof
The lifespan of metal shed roofing is measured in the 'time to first maintenance'. The information below is based on date from Corus the steel manufacturer.
The time to first maintenance is for a galvanised steel sheet with no other protection. Environmental exposure is divided into four progressively more corrosive categories. A coastal environment with wind driven salt spray is very hard on metal roofs. Whereas a dry desert environment does not promote corrosion in to the same extent.
Times to first maintenance for steel cladding
- Dry and unpolluted 20-50yrs
- Suburban and rural 5-10yrs
- Industrial and urban 2-5 yrs
- Coastal 1-5 yrs
As you can see there is quite a variation. The same roof in an exposed coastal environment has a fraction of the time to first maintenance of the same roof located in say the Arizona desert.
The corrosion protection system influences the life of a shed roof
The basis of the system is a zinc coating, called galvanising. This coating creates a sacrificial layer on the steel that protects the bare steel beneath. A typical coating thickness is 275 g/m². This layer of zinc is gradually worn or washed away when it is exposed to the elements. Once the zinc coating has broken down the steel will begin to rust. However if the zinc coating can be protected then the life span can be greatly extended.
A typical polyester paint system will extend the time to first maintenance in a coastal environment from 1-5years up to 10-15 years.
A PVC Plastisol coating is more durable still and can give a time to first maintenance in a coastal environment of 15-25 years.
In addition there is significant evidence that when choosing a paint colour that a light colour will last significantly longer than a dark colour. A light colour can have a time to first maintenance twice that of a darker colour. The reason being that the light colour tends to reflect the heat and suffers less thermal stress than a dark colour.
Congratulations you have completed the first section on metal shed roofing. Now we can move on to the components of a shed roof.
2.0 Components of metal roofing systems
The basic components of a metal roofing system are:
- Metal roof panel
- Ridge cap
- Roof verge trim
- Drip edge
- Underlayment
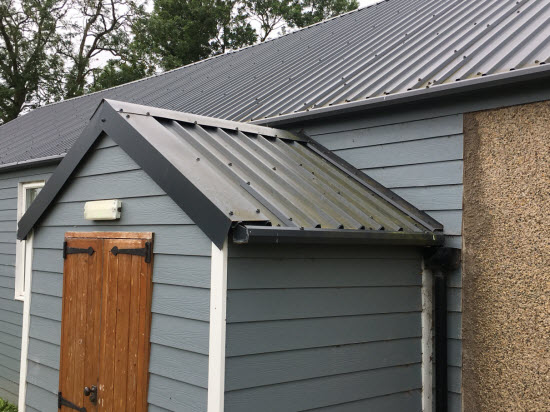 The main components of a metal roofing system
Metal roof panel
Panels come in a variety of raised rib styles
The sheet steel to form the panels is delivered to the roofing factory in a pre- galvanised coil. The sheet steel is then passed through rollers to give it shape and stiffness. It then goes through a painting/coating process to give it colour and protection from the elements.
The roofing systems that I talk about here are the standard lap systems. More sophisticated 'standing seam' systems are available. But these systems require expensive tooling and so don't really suit the diy shed builder.
There are a variety of roof profiles available and they can vary from one supplier to another. I have shown below a variety of different panel styles that are available. Each one has it's own characteristics and so you should check with your supplier as to minimum side overlap, purlin and fixing spacings.
- The Ag panel is widely used on agricultural buildings in the USA and the dimensions are based in feet and inches.
- The box panel is a widely available in the UK and Europe.
- Whereas the wavy profile is commonly called 'corrugated iron' it is where metal siding and roofing originated from. It is available all over the world in different forms.
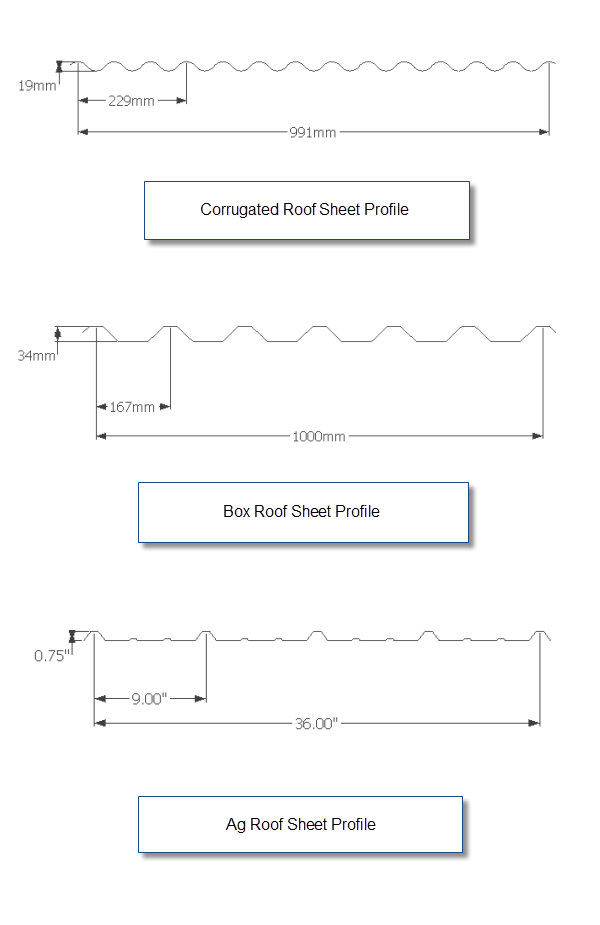 Commmon metal shed roofing profiles
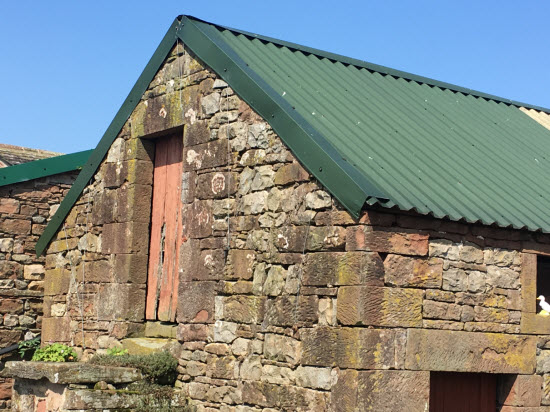 Corrugated iron roofs can often be seen as a roofing material on old barns
Points to note are the edge lap required for each system and the sealing requirements. If you are specifying for a high spec project silicone caulk may be required on joints and seams. However, for agricultural applications the degree of weather tightness can be less critical.
Ridge cap
The ridge cap is the essential component of any metal roof 'system'. It covers the join between the two sheets at the apex of a gable shed. Ideally the ridge cap should be made so that the corrugations match with those of the roof sheet. However, on many systems as you can see this doesn't matter.
Roof verge trim
The roof verge trim piece is used to stop driven rain and water getting in between the junction of the roof and the gable wall of the shed.
Drip edge
A drip edge isn't essential with metal roofs as the edge of the roof forms its own 'drip'. The main requirement is that the roof sheeting cantilevers over the shed wall so that it can discharge into the roof gutter.
Underlayment
One problem with metal shed roofs is that of condensation on the underside. This mainly happens in damp climates and the resulting dampness can cause problems with the contents of the shed. To stop this happening on sheds where the metal roof panels are being used in conjunction with a timber roof deck then an underlayment such as tar paper or building paper is used. My recommendation would be a material such as Tyvek that is waterproof and long lasting. This underlayment catches any drips of condensation and they can then run down the roof slope and out of the building at the eaves.
3.0 How to secure your steel roof
The great thing about a steel roof is that you have a great deal of control how strong it is. You do this primarily by the spacing of roof purlins you use and also the number of fixings. The main problem for steel roofs is uplift when subject to high winds. So, an important factor is the fixings used to secure the metal sheets to the timber roof structure.
Roofing nails aren't used for metal roofs. Special roofing screws are recommended.
The points to note on a roofing screw.
- The screw has an end that doubles as a drill (also known as a self tapping screw) so that in theory you don't need to pre-drill a hole to install the screw.
- The screw has a coarse thread for securing into the structural purlin or rafter.
- You will need to purchase the correct length of screw so that you can get a good fixing into this structure.
- The screw will have what appears to be a rubber washer beneath the screw head. In fact, the washer is made of EPDM, which unlike rubber, will not perish when subject to UV light. The washer, when slightly compressed, will make a waterproof seal between the underside of the screw head and the roof to stop water getting in.
Where to fix the screws in metal roof panels?
You have a choice with where to fit the screws. In the trough of the metal profile or on the raised ridge. My choice is always to go for the ridge.
The trough, or flat part of the panel, has the attraction that you can secure the screw tightly. But the trough is where the water flows to and eventually water will find a way through the screw holes.
When fixing through the ridge a little more care is required. You will need to check the depth of the profile and make sure that the screw is the correct length such that it can accommodate the depth of the corrugation and still be secured into the timber structure beneath. In addition, make sure that you don't overtighten the screw, this will deform the panel. A good seal between the panel and the screw is easy to do after a couple of attempts to learn the correct torque to apply with your screw gun.
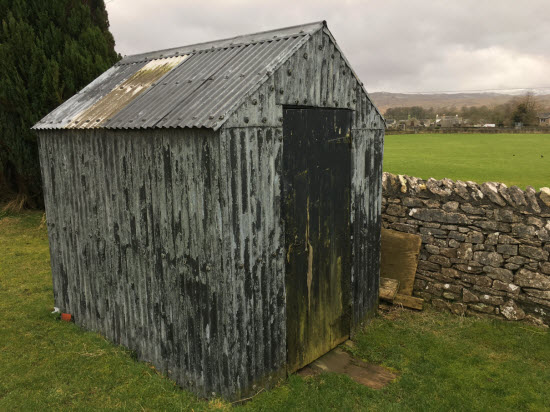 An example showing how durable metal shed roofs can be. This one is located near Shap Fell in Cumbria at about 1,000 ft above
sea level. It has been resisting wind and snow load for many, many years!
How to cut the metal panels
Many metal roof system suppliers will supply the sheets cut to length. However, it is almost inevitable that you will need to cut a panel at some point. This may be cutting the panel to length, rounding off corners or cutting a hole to accommodate a window or pipe.
Cutting steel panels isn't a job for your trusty old circular saw. At a pinch a pair of tin snips could be used but I would recommend using a malco turboshear. These are a tool that you fit on the end of your drill and are designed for cutting corrugated roofing materials.
The most basic model will only cut straight lines or curves to the left, so if you choose that one you will need to plan your cuts carefully. The more expensive models will cut both ways. These machines will cut material up to 18 gauge (1.22mm).
You now have the knowledge you need to start your roofing project.
You can choose the steel sheet, roofing components and fixings for your project. You also have the knowledge how to cut steel sheet.
Get ready for a great new roof.
Related posts:
- Onduline roofing works in a similar way to metal roofing but is potentially easier to work with - find out more
- Find out more about all types of shed roofing systems

Keep in touch with our monthly newsletter
Shed Building Monthly


